Rails インスタンスが持つインスタンス変数一覧をハッシュで取得
ActiveRecordのattributes的な。
instance_values でできるみたいです。(要ActiveSupport)
[1] pry(main)> class Hoge
[1] pry(main)*   attr_accessor :a, :b, :c
[1] pry(main)* end
=> nil
[2] pry(main)> hoge = Hoge.new
=> #<Hoge:0x007fec4b2859d0>
[3] pry(main)> hoge.instance_values
=> {}
[4] pry(main)> hoge.a = 1
=> 1
[5] pry(main)> hoge.c = 4
=> 4
[6] pry(main)> hoge.instance_values
=> {"a"=>1, "c"=>4}
値が入っていないインスタンス変数は無視されるし、使い勝手がいいです。
@でインスタンス変数を足したときも見てみました。
[1] pry(main)> class Hoge
[1] pry(main)*   def sss
[1] pry(main)*     @s = 12
[1] pry(main)*   end
[1] pry(main)* end
=> :sss
[2] pry(main)> hoge = Hoge.new
=> #<Hoge:0x007ff1f3c5df40>
[3] pry(main)> hoge.instance_values
=> {}
[4] pry(main)> hoge.sss
=> 12
[5] pry(main)> hoge.instance_values
=> {"s"=>12}
[6] pry(main)>
足されてますね〜。
office365体験版をアカウントに関連づける
メチャクチャ分かりにくかったので。officeは商品の種類とか、ライセンスとか、ユーザーを混乱させようとしているとしか思えない。
管理画面で ユーザとグループ > ユーザを選択 > 鉛筆マーク > ライセンス > Office 365 Small Business Premium 10 ライセンス中 10 ライセンスが使用可能を有効にする
体験版って言う文字も無いし。。。
Mac renameコマンド
すごく便利ですね〜。
こちら参考にさせてもらいました。
インストールは
brew install rename
例えば、現在のディレクトリ内の全部の.pngファイルを@2x.pngにしたいときは
find . -not -name '*@2x*' | grep .png | awk -F"/" '{print $2}' | xargs rename 's/.png/\@2x.png/'
みたいな感じです。
@2x を含んでいないファイル一覧のなかで、.png を含んでいるもので、/で区切られた2番目の文字 のファイルの .png を @2x.png に置換しています。
あ、でもデザイナーさんからもらった画像ファイル名をいじる時以外使ってないなぁ・・・(^-^;
iOS NavigationBarとTabBarを考慮したUIViewControllerのviewを取得
viewWillAppearで取得する。
// exist NavigationBar and TabBar

- (void)viewDidLoad
{
    [super viewDidLoad];
    NSLog(@"self.view %f %f %f %f", self.view.frame.origin.x, self.view.frame.origin.y,
}

- (void)viewWillAppear:(BOOL)animated
{
    NSLog(@"self.view %f %f %f %f", self.view.frame.origin.x, self.view.frame.origin.y,
}
結果 568 = 455 + 64(NavigationBar height) + 49(TabBar height) で合っている
2014-04-10 19:27:31.286 hoge[10598:60b] self.view 0.000000 0.000000 320.000000 568.000000
2014-04-10 19:27:31.302 hoge[10598:60b] self.view 0.000000 64.000000 320.000000 455.000000
iOS QuickDialogのひとつのelementsのappearanceをいじったら全部の見栄えが変わってしまう件
ハマりました。
// NG
[self.root elementWithKey:@"hoge"].appearance.backgroundColorEnabled = [UIColor redColor];
これでやると、なぜか他のelementの色も変わっちゃう!(?_?)
いろいろデバッグしたりしてかなり彷徨っていたんですが、
// OK
QAppearance *appearance = [QAppearance new];
appearance.backgroundColorEnabled = [UIColor redColor];
[self.root elementWithKey:@"hoge"].appearance = appearance;
これで解決しました。なんて事はない、appearanceごと変えなきゃいけなかったんですね。そして、初期状態では全てのelementsは同じインスタンスのappearanceを見ているんですね。効率化のためなのでしょう。
でも、そのおかげでよけいに迷った・・・。
なんかframeの変更の仕方を思い出しました。
CGRect frame = view.frame;
frame.size.height += addValue;
view.frame = frame;
これも最初よく間違えてました。
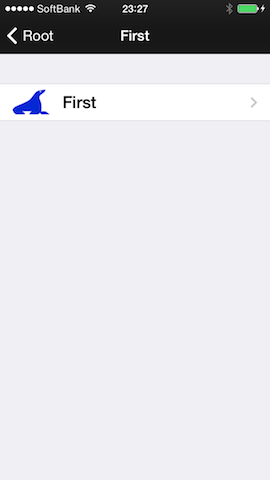
iOS QuickDialogからさらにQuickDialogを開きたい〜!(電波少年風)
QuickDialogのサブクラスを作って手でうちゃうちゃやるのはあまりよろしくなさそうという事で、カテゴリでやってみました。
これが正解のやり方だとは思っていないので、もっといい方法があれば教えて頂きたいです。
UIViewController+showQuickDialogController.hというカテゴリを作りました。ここでQElementを受けられるようにしておき、そのbindされたデータに基づいてpushかmodalかして次のQuickDialogControllerを表示します。
#import "UIViewController+showQuickDialogController.h"

#import "QuickDialog.h"

@implementation UIViewController (showQuickDialogController)

- (void)pushQuickDialogWithElement:(QElement *)element
{
    id JSON = element.bind;
    [self pushQuickDialogWithJSONDic:JSON];
}

- (void)presentQuickDialogWithElement:(QElement *)element
{
    id JSON = element.bind;
    [self presentQuickDialogWithJSONDic:JSON];
}

- (void)presentQuickDialogWithJSONDic:(NSDictionary *)JSON
{
    [self presentViewController:[self quickDialogControllerWithJSONDic:JSON] animated:YES completion:nil];
}

- (void)pushQuickDialogWithJSONDic:(NSDictionary *)JSON
{
    [self.navigationController pushViewController:[self quickDialogControllerWithJSONDic:JSON] animated:YES];
}

- (QuickDialogController *)quickDialogControllerWithJSONDic:(NSDictionary *)JSON
{
    return [[QuickDialogController alloc]initWithRoot:[[QRootElement alloc]initWithJSON:JSON andData:nil]];
}

@end
使う側では、elementのcontrollerActionにpushQuickDialogWithElement:(or presentQuickDialogWithElement:)を指定して、bindするデータにさらに次の画面用のQRootElementのJSONを入れておく。
#import "UIViewController+showQuickDialogController.h"

// ...省略

- (void)viewDidLoad
{
    [super viewDidLoad];

    [self pushQuickDialogWithJSONDic:[self firstJSON]];
}

- (NSDictionary *)firstJSON
{
    return @{
             @"grouped": @YES,
             @"title": @"First",
             @"sections": @[
                     @{
                         @"elements" : @[
                                 @{
                                     @"type" : @"QLabelElement",
                                     @"imageNamed" : @"aaa",
                                     @"title" : @"First",
                                     @"bind" : [self secondJSON],
                                     @"controllerAction" : @"pushQuickDialogWithElement:"
                                     }
                                 ]
                         }
                     ]
             };
}

- (NSDictionary *)secondJSON
{
    return @{
             @"grouped": @YES,
             @"title": @"Second",
             @"sections": @[
                     @{
                         @"elements" : @[
                                 @{
                                     @"type" : @"QLabelElement",
                                     @"imageNamed" : @"aaa",
                                     @"title" : @"Second"
                                     },
                                 @{
                                     @"type" : @"QLabelElement",
                                     @"imageNamed" : @"aaa",
                                     @"title" : @"Second"
                                     }
                                 ]
                         }
                     ]
             };
}
無事いけました。
secondJSONでもbindとcontrollerActionをfirstJSONと同様につけたらさらにもう一段遷移できます。


本当はbind中のデータからメソッドを作ったりしたかったんですけど、よくわからず、カテゴリでできたのでこれでやっちゃいました。
自分用時計Mac App作った
Obsician Menu Barでmenu barを黒くしていると、時計の時刻が見づらくなりまして。 それで、時計だけを表示するMacAppを作ってみました。

この佇まい。

Quitのみ。
Mac Appはあまり作った事がないのですが、UI以外のところはiOSとほとんど同じ感じですね。
ここを参考にしました。
#import "JOGAppDelegate.h"

NSStatusItem *statusItem;
NSMenu *theMenu;
NSDateFormatter *formatter;
NSDictionary *attrDict;

@implementation JOGAppDelegate

- (void)applicationDidFinishLaunching:(NSNotification *)aNotification
{
    NSMenuItem *tItem = nil;

    theMenu = [[NSMenu alloc] initWithTitle:@""];
    [theMenu setAutoenablesItems:NO];

    tItem = [theMenu addItemWithTitle:@"Quit" action:@selector(terminate:) keyEquivalent:@"q"];
    [tItem setKeyEquivalentModifierMask:NSCommandKeyMask];

    NSStatusBar *statusBar = [NSStatusBar systemStatusBar];
    statusItem = [statusBar statusItemWithLength:NSVariableStatusItemLength];

    [statusItem setHighlightMode:YES];
    [statusItem setMenu:theMenu];

    formatter = [NSDateFormatter new];
    [formatter setLocale:[NSLocale currentLocale]];
    [formatter setDateStyle:NSDateFormatterNoStyle];
    [formatter setTimeStyle:NSDateFormatterShortStyle];

    attrDict = @{
                 NSFontAttributeName : [NSFont boldSystemFontOfSize:12],
                 NSForegroundColorAttributeName : [NSColor lightGrayColor]
                 };

    [self setNowStr];

    [NSTimer scheduledTimerWithTimeInterval:3.0f target:[NSBlockOperation blockOperationWithBlock:^{
        [self setNowStr];
    }] selector:@selector(main) userInfo:nil repeats:YES];
}

- (void)setNowStr
{
    NSAttributedString *attrStr = [[NSAttributedString alloc]initWithString:[formatter stringFromDate:[NSDate date]] attributes:attrDict];
    [statusItem setAttributedTitle:attrStr];
}

@end
.app も後で公開してみよう。
あとはユーザが画像を入れたらmenu bar上でパラパラ漫画ができるのとか作ってみようかな。